
A poorly adapted floor reduces the lifespan of a trailer, regardless of its use. Some materials, known for their durability, can deform under the effects of moisture or weight, while less expensive solutions sometimes hold up much better than expected.
Safety standards impose specific constraints on installation, but errors in fitting or poor choices in fasteners remain common, even among experienced DIYers. Compatibility between the chassis, the floor, and the type of attachment directly influences the overall reliability.
Recommended read : How to Choose Stylish and Practical Furniture to Enhance Your Interior
What essential criteria should be considered when choosing a floor suitable for your trailer?
Installing a trailer floor is not just a matter of aesthetics or budget. It all starts with the load that the trailer will carry, but also with its type: flatbed, utility, or even tiny house. The GVW (gross vehicle weight) sets the first limit and immediately guides the possible materials.
Here are the main alternatives available to you based on usage:
See also : How to Connect to MyCampus Eduservices: Practical Guide and Useful Tips
- Wooden floors, classic and sturdy, remain a common choice for moderate loads and for their ease of cutting.
- The waterproof plywood floor, more technical, stands out for its better resistance to moisture where standard wood fails.
To withstand intensive use or harsh weather conditions, a galvanized steel floor or aluminum floor comes into play. Their durability over time and ease of maintenance make a difference. Another criterion gaining ground is the stability of the floor. Composite or HDPE plastic models lighten the trailer while maintaining good resistance to deformation.
Compliance with regulations is imperative. Depending on the size and load, it will be necessary to check if the B, B96, or BE license is appropriate. Sometimes, a de-tarage is required to stay within legal limits. It is also impossible to overlook the issue of compatibility with the trailer chassis: a poorly fitted, poorly screwed floor guarantees fragility that can be costly. To make an informed choice, draw inspiration from detailed feedback on trailer floor brico depot solutions published in “Trailer Floor Brico Dépôt: Expert Tips for Perfect Fixing – Idees-maison.com”.
The choice of material is never neutral: particle board for a tight budget, polyester to lighten and facilitate transport, expanded metal to ensure good grip. This diversity allows each project to be adapted to actual use, whether in France or across Europe.
Bare chassis, 13-pin wiring, and materials: an overview of practical solutions
The foundation of success is the trailer chassis. A bare chassis, without accessories, leaves free rein on the choice of floor and the configuration of the trailer. The axle, single to optimize maneuverability, double or triple to aim for stability and higher load capacity, directly influences the type of floor to be installed. Each use, whether a dump trailer, luggage trailer, or utility flatbed, requires its own considerations.
To ensure the proper functioning of electrical equipment, 13-pin wiring has become the standard. It ensures reliable power supply to lights, turn signals, and also to more specific accessories. Some newer trailers require planning, from the design stage, for power supply to an electric pump (in the case of a tipping trailer) or a dedicated socket for a fridge or interior lighting.
The selection of the floor material depends on several factors: strength, weight, cost, maintenance. Here are the most common options and their strengths:
- Laminate wood, versatile, is found on utility trailers and for transporting wood.
- Galvanized steel, reassuring for intensive use or on construction sites, withstands without weakening.
- Aluminum, significantly lighter, facilitates handling on a bike trailer or for children.
Attention to fastening is crucial. Stainless steel fasteners, corner brackets, threshold bars: every detail counts to ensure reliability and longevity, regardless of the type of trailer.
Key steps to successfully install and set up your floor, from bike to tiny house
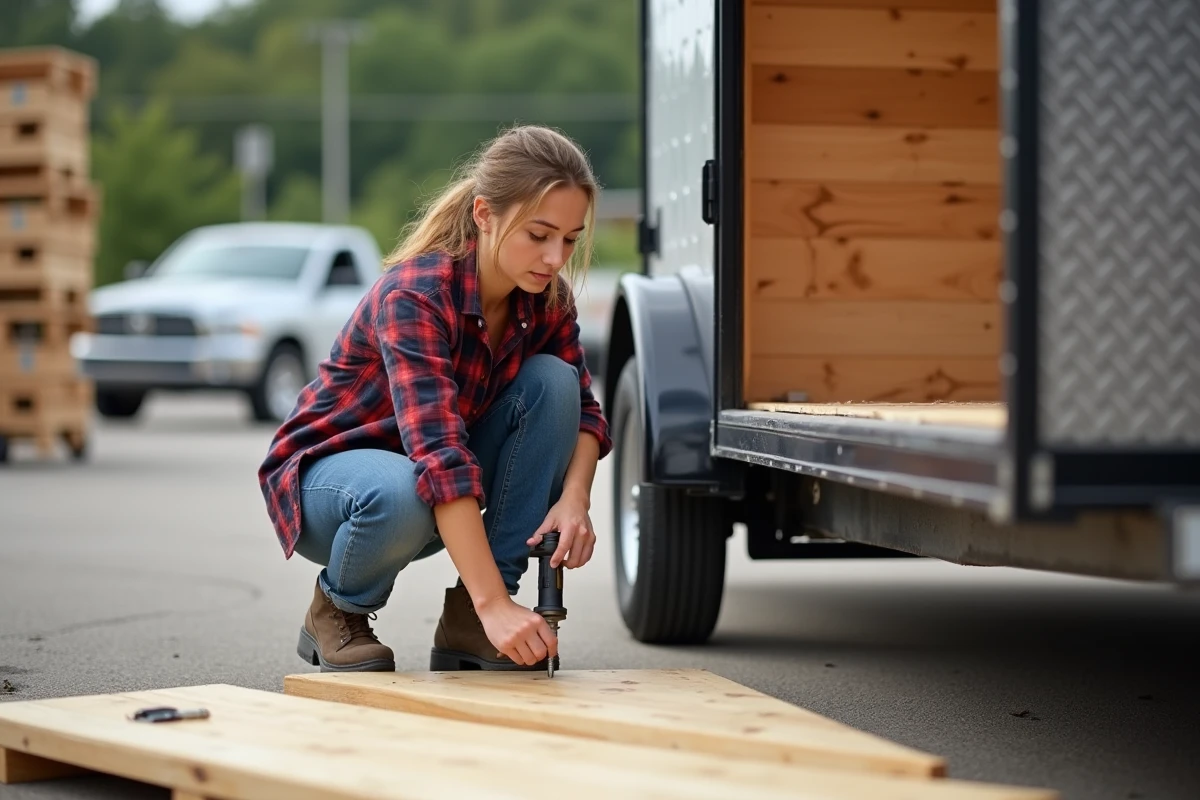
Before starting, you need to prepare the platform. A thorough cleaning, checking the general condition, and, if necessary, applying a waterproofing product to exposed areas is essential, especially for wood or plywood. This simple step helps preserve the structure, particularly if the trailer will face rain, frost, or UV rays, or if a tiny house trailer is on the agenda.
Once the surface is ready, measure the interior space of the chassis accurately. Use appropriate tools to cut the chosen material, aluminum floor, galvanized steel, HDPE, or composite, to achieve a clean fit, without tension or floating. Consider the necessary cuts for wheel arches, tie-down rings, or, for a tiny house, the attachment points for furniture.
Installing the covering requires rigor and method. Securely screw each panel with stainless steel fasteners, reinforce the edges using aluminum corner brackets or a threshold bar to limit wear during loading. In high-traffic areas, install a non-slip covering: this precaution is just as important for a bike trailer, a stroller, or for transporting professional equipment.
To finalize the installation, apply finishing cups around the screws and tie-down points. This attention to detail preserves robustness and ensures waterproofing. Step by step, this is the promise of a floor built to last, suitable for every scenario, from transporting goods to a long-term tiny house trailer.
In the end, it’s the reliability of the whole that matters: each trailer, well thought out and solidly assembled, becomes an ally for daily life or a traveling project. The road awaits you and your rigorous choices.